
The northern lights rank among the most sought-after natural phenomena in travel photography – and among the most humbling to actually capture. They move unpredictably, appear when conditions align rather than when it’s convenient, and have a way of being either nowhere to be seen or overwhelming in their scale. Getting a photograph that does them justice requires some preparation, a willingness to stay up late, and a reasonable tolerance for cold.
Understanding What You’re Actually Photographing
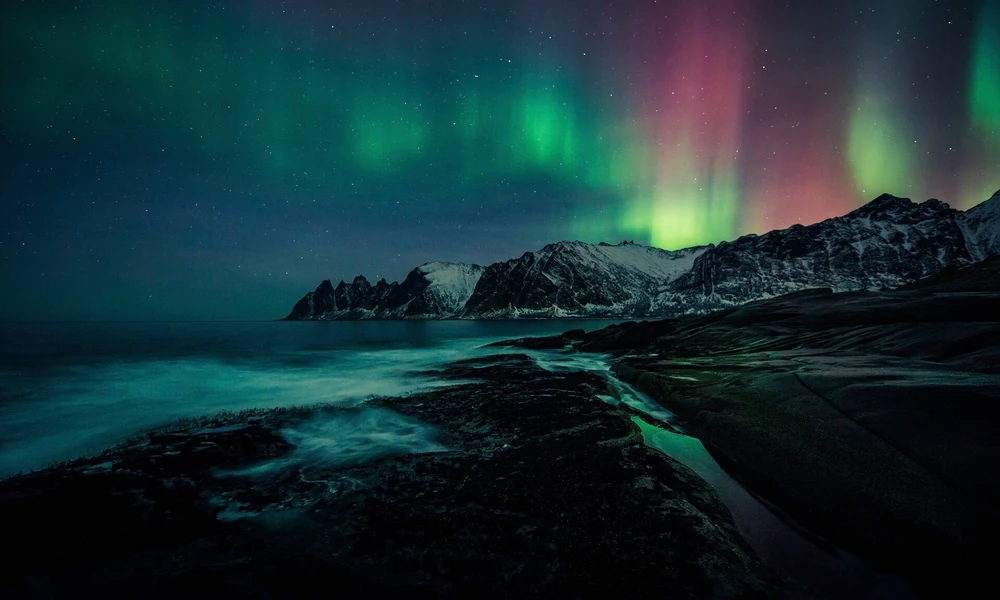
The aurora borealis is produced when charged particles from the sun interact with gases in Earth’s atmosphere, releasing energy as visible light. The colors – green most commonly, with occasional red, purple, and pink at higher altitudes – vary based on which gases are involved and how high in the atmosphere the collision occurs.
What this means practically is that aurora displays are governed by solar activity, which follows an eleven-year cycle and can be predicted with some accuracy several days in advance using geomagnetic storm forecasts. Apps like Space Weather Live and My Aurora Forecast aggregate this data and give travelers a real-time sense of how likely a display is on any given night. The KP index – a scale from 0 to 9 measuring geomagnetic activity – is the key number to watch. A KP of 3 or higher is generally sufficient for a visible display at high latitudes; stronger storms produce more dramatic and widespread aurora.
Where to See Them
The aurora is visible in a band around the magnetic poles, roughly between 65 and 72 degrees latitude in the northern hemisphere. Alaska sits squarely within this range, making it one of the more accessible aurora destinations for North American travelers. Fairbanks is particularly well-positioned, averaging more clear nights than coastal areas and lying directly beneath the auroral oval.
For travelers on an Alaskan cruise, the timing and latitude of the itinerary matter considerably. Summer sailings bring the midnight sun – continuous daylight that makes aurora viewing impossible regardless of solar activity. The season when darkness returns, from late August onward, is when the lights become visible again. Shoulder season sailings and itineraries that push further north increase the odds meaningfully.
Dark skies are as important as latitude. Light pollution from cities and ships can wash out all but the strongest displays. Positioning yourself away from artificial light – ideally with an unobstructed northern horizon – makes the difference between seeing a faint glow and witnessing a full display.
Camera Settings That Actually Work
Aurora photography requires a camera that allows full manual control. Smartphones have improved significantly and can capture faint aurora in recent years, but a dedicated camera with a wide-angle lens gives you considerably more control and image quality.
The basic settings for a starting point: ISO between 1600 and 3200, aperture as wide as your lens allows (f/2.8 or wider is ideal), and a shutter speed between 5 and 15 seconds. The tradeoff between these settings is the central challenge of aurora photography. A longer shutter speed gathers more light but blurs a fast-moving display. A shorter shutter speed preserves the aurora’s structure but requires a higher ISO, which introduces noise. Start at 10 seconds and adjust based on what you’re seeing.
A sturdy tripod is non-negotiable. Any camera movement during a long exposure ruins the shot. A remote shutter release or the camera’s self-timer eliminates vibration from pressing the shutter button manually. Manual focus set to infinity – verified before it gets dark, since autofocus struggles in low light – completes the basic setup.
Shoot in RAW format if your camera supports it. The additional editing latitude in post-processing makes a significant difference in recovering shadow detail and managing noise.
Timing and Patience
Aurora displays tend to peak in the hours around midnight, though significant activity can occur anytime between dusk and dawn. Checking the forecast in the early evening gives you a sense of whether it’s worth staying up. A clear forecast combined with a KP of 3 or higher is a good reason to set an alarm for 1 a.m.
The practical reality of aurora hunting is that most nights produce nothing and a few nights produce something extraordinary. Experienced aurora photographers build multiple nights into their plans rather than counting on a single evening. Dressing for sustained cold – more layers than you think you’ll need – makes the waiting considerably more pleasant.
Managing Expectations
The northern lights on camera and the northern lights in person are different experiences. The camera’s long exposure gathers light over several seconds and often produces more vivid color than the eye perceives in real time. What looks like a faint greenish glow overhead can become a striking photograph. Conversely, a dramatic visual display that moves faster than your shutter speed can look less impressive in the final image than it did in the moment.
Both outcomes are worth experiencing. The photograph is evidence; being there is the point.